Farmer Brown

As you know we moved into a rental home earlier this year - an actual house with a yard and everything. Dang, we're so grown-up now. Having a yard gave us the opportunity to have a garden, and better yet there was a empty garden bed. It was screaming for us to plant veggies (not literally, that would be weird). So, we headed to the garden store, got our hands dirty, and started a garden. 

We started out by hitting up Swanson's Nursery. We grabbed a cart and got some starter plants and some fertilizer. Generally, a good way to start, right? 

When we got home, Josh was good enough to do the digging and fertilizer job. That's my macho man!

Then he came up with the idea of doing a grid system. He's pretty clever, too! 

We planted all sorts of goodies including spinach, kale, lettuce, tomatoes, peppers, onions, strawberries, zucchini, parsley, thyme, and sage. Off in another area we planted basil and rosemary as well.

Once it was all safely in the ground, of course, we had to let it grow. 

Can you identify what everything is? I hope you can at least guess the onions above. 

The weather turned pretty hot here for a few weeks so it was a struggle to keep things alive. Some made it, some didn't. We learned that when the weather gets hot, spinach can "bolt" - not running away bolt, but just grow upward and flower. Basically, it was not edible (Sad Trombone). Our strawberries didn't quite make it either but the plant lives on so they may still grow something. But sadly our tiny pepper dropped off the plant. 

On the bright side, we got some tasty kale, lettuce, zucchini, and carrots. Seriously, the zucchini...it was massive. And there is more zucchini in-the-works. Yay! Here's me picking the carrots. Ta Da! 

It was a good first harvest for us first time gardeners. I used our kale in a yummy pasta dish, the zucchini we grilled on 4th of July, and the lettuce we used on turkey burgers. Yum yum freshness!

I'd like to dedicate the garden success, though, to Josh. He diligently waters every morning. I think I watered it like twice. I'm not the greatest gardener, but together we did pretty good. Maybe next time we'll feel brave enough to start from seeds instead of starters. We'll see.

Way to Go...Wayzgoose

You might remember Wayzgooze from last year? Maybe not. It's not like I expect you to follow my life or anything. Or wait a minute, you do...if you read my blog that is. So you really should remember. And if you don't, then maybe you need to start reading this blog more. I mean come on people, my life rocks. At least, that's what I lead you to believe (insert Heather's evil laugh). 

Seriously now. Last Friday was the annual Wayzgooze event. This is the second year my company has entered, but this year as Oracle. It's a ton of fun, and it's so awesome to see my creative peeps at work. This year we had even more of a turn out (probably since word got out about how fun it is). Not to mention our print rocked.

This year the event was at the South Lake Union Block Party, so there were many more folks around. I wasn't sure how it'd go being at the block party, but the printing was off to the side in the parking lot and it actually turned out great (although a bit hot). 

Time out: Are you sitting there scratching your head about what the heck Wayzgoose is? Okay, I'll pause and explain. Basically, there are teams (from a company or group) and there is a theme (this year it was South Lake Union). Each team designs a poster then transfers that design onto a sheet of linoleum, crave it out, and at the end you have a huge stamp. At the event, you roll paint onto the stamp, place poster paper on top, and then a steamroller runs over it (instead of a printing press).

Let me share some photos! Here's the carving in action in the office.

And here's us painting and carefully placing the poster down and then off.

The steamroller, of course...it's cool. (Sorry for the fuzzy photo, I only took my cell phone with me).

Our beautiful poster. I was amazed at the details our team was able to pull off. We got honorable mention - basically second place. We really should have gotten first place. Not that I'm biased, but it's true! 

Here is the winner (the red one on the far right) and the other honorable mentions. They were good, I guess. Yea, okay, they were good.

The winner poster is a unicorn and was created by TenGun. The horn is the Space Needle. It says SLU (South Lake Union, or Seattle Loves Unicorns). Cute. The Otter was created by DrawSeattle (I believe). Lastly, the Octopus was created by Starbucks Creative. 

I must admit, all the posters were pretty fantastic. 

What a great event?! Our team was happy with our second year winning a trophy. Go Oracle! Yay team! Look at us...such winners.

Are you dying for more photos? Well, my co-worker, Henry, took some great shoots. I don't think he'd mind if you had a look. 

Be on the lookout for Wayzgoose again next year! I'm pretty sure we'll be in first place - third time is a charm, right? 

Green Thumb and Terrariums

Oh, hello there. Happy spring! I know it's been a while since I posted on my blog. Please accept my sincerest apologies. Work has been busy, and the last thing I want to do is sit at my computer more and type. But I've missed my unknown blog friends, and I have some some fun things to share. For starters, I want to share the newest addition to our home: my terrarium. 

Yes, I fell for the new terrarium trend. It really is a trend; they're all over the place - on Pinterest, at the farmer's markets, in magazines, on blogs...everywhere. I couldn't resist the cute, little succulents. Plus, I figured it would be a nice touch to our apartment by bringing the outdoors in. Not to mention we don't have room for a garden outside, so this way I can try out my green thumb in smaller ways. (By the way, I really don't have a green thumb. It's more of the black thumb of death when it comes to plants. But I hear succulents are resilient, so I thought I could at least try. I'm forever hopefully. )

I thought I would do all the research and read before starting it, that would be the wise thing to do. Instead, I decided to just do it. So, I started at the nearby florist, Midnight Blossom, to see what I could create. The place was super cute, but somewhat pricey. Instead, I opted to try out the garden center up the road instead, Swanson's Nursery

The lady there was nice to give me some quick tips, and steered me to the "Terrarium Basics" sheet they have available. It's actually not too hard; here's what I ended up doing...

Supplies

Assembly

The image says it all, but here's the steps:

  1. Container - I had a hard time choosing: circle, square, rounded on top, open, white, glass - ahh! I landed with an open, square glass container: Reasons: Glass is brighter and allows you to see the layers which is a nice touch. Open on top because it's easier for beginners. And square just because. Note - In retrospect, I'd probably say start with something smaller than mine.
  2. Pebbles - Layer on the pebbles first. This provides drainage.
  3. Charcoal - Layer again. This is to make it less stinky (not that it is a smelly plant). Also it keeps the soil fresh.
  4. Soil - Yet another layer. This is for the plants to grow roots (I think). One tip here is to be sure to buy the right kind of soil. I was steered towards the catcus/succulent soil mix. 
  5. Admire the layers.
  6. Get a variety of plants - different textures, colors, heights. 
  7. Plant - I made little divots in the soil, placed the succulent, and then pushed the soil around it gently. I probably would have put in less soil in #4 since adding the plants does take more room than I thought. But I managed.
  8. Sand - The sand wasn't totally necessary, but I thought it'd look nice. I was close to the top of my container by this time. 
  9. Decorations - I didn't plan on this, but I decided to add on some shells. They shells are from our Hawaii trip in 2006 (oh memories!). 

Location

When all is done, find the perfect place in your home. Mine is situated on the kitchen table as a center piece. 

Ta Da!

And there you have it. Join the trend and make one. It's not as hard as you think. 

Good luck on your succulent adventures. Now, if only I can keep mine alive.

Hanging the Jewels: DIY

I don't actually do that many DIY projects. I would like to, but I never seem to just hunker down and do them. The last real project was last year (remember this)! Usually it's because I'm slightly intimidated by them.

I go on Pinterest, and see all these folks pinning awesome DIY projects. Do people actually do those projects? I wonder. Am I the only gal that's looks at something and thinks it just too much work?

When I came across this jewelry board on Jones Design, I thought that this might actually be one I could take on. Not too complicated, and the materials & tools seemed simple enough. Although the post didn't actually explain the project step by step, I though I could swing it. Plus, I had the cork board just sitting here - it has been in our office since we moved here (so for 3 years).

Not to mention, I've been wanting to organize my jewelry for ages. I've been eyeing cute organizers on Etsy. Like this one, and this one. Oh, and then there is this DIY project, too, but the wood and knobs ... yikes! 

I decided why spend so much, when this one could actually created, by me, on the cheap... challenge accepted.


P1080707.jpg

And guess what? I DID IT. It was pretty easy, too. Let me tell you how this is done...

First, you need supplies. Here's what I got:

  • Cork board - IKEA for $5.99
  • Burlap Fabric - Joanns for $3.99/yard (like 2-3 yards)
  • Decorative Nails - Joanns for $2.99
  • Ribbon or Lace - Joanns (can't remember)

As for tools, well, I thought I didn't have a staple gun, but I did. Woohoo! Otherwise, I was planning on glue - like the glue gun. I bet it would work, too. And that's the only tool you need. 

P1080699.jpg

Lay the fabric on the floor, and place the board cork down. Then, staple on the back. I got the staples as close to the wood frame as possible. Make sure to tug the fabric to make sure it's all snug. 

P1080703.jpg

When you get to a corner, just put in lots of staples. I tried to be tidy, so I folded the fabric - just like you would like when wrapping a gift - at the corners. Go all the way around. Remember to keep pulling to ensure it's tight.

P1080704.jpg

Then I placed the ribbon in diagonal stripes across the board. And staple some more. Lastly, put in the decorative pins all around. I tried to visualize the board as a grid to make it even spacing, but I didn't go crazy. Just eye ball it. Nobody will judge. 

P1080705.jpg

That's pretty  much it. I had a fabric flower thing on my dresser that I never use, so I put it in the corner. Then just grab some push pins and hang those necklaces! Voila! 

P1080709.jpg

After I made this board, but before I wrote this post, I noticed Jones Design came out with her own step by step instructions. You can check it out, if you think my instructions aren't good enough (which would make me sad). But I like the fabric option she shows, so you can check it out for idea purposes (and that would be okay; my feelings won't be hurt). 

It took my like an hour, or less, and now my necklaces are on display. Benefits of this board:

  • I can quickly access which one I want to wear.
  • They are kept from getting tangled up.
  • They make the room dazzle. 

I think you can totally do it. Totally!

Or, if you're nice enough, and you really want one, I might just make it for you for a birthday or Christmas. 

Deck the Walls

Josh and I decked our walls this weekend. It's been a work-in-progess, and still is, but we made some stellar headway over the weekend. 

It all started with my want for a subway sign. I first saw these subway blocks at a local store in Ballard called Jax Joon. Everytime we walked in the store I ohh and ahh'd over them. They had cute sayings on them like "A True Love Story Never Ends." Or "Live what you Love." How cute is that? 

Josh didn't like these cute little sayings as much as me. So I put my thinking cap on. First, the next time we went to the store, I looked on the back of the sign and found it was a Primitive. Then, I started investigating on Etsy searching for primatives. Next I found out that the style I liked was subway. I narrowed my search more, and I came across a site that lets you personalize a subway sign. However, this wasn't a wood block. Gosh darn it, I want a wood block. I want a wood block with subway letters. It's GOT to be out there. You know when you get an idea stuck in your head? This was one of those times. This was officially a quest.

So I kept going next, next, next on the Etsy pages. Finally, I came across Expressions Wall Art. This Etsy seller had my blocks + it had my subway letters. So, I wrote the seller a message and asked if she personalizes her wood blocks. YES! 

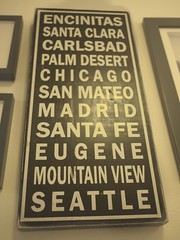
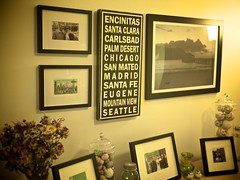
Then Valentines rolled around, and what do I ask for? My Sign! And Josh being the loving husband he is agreed to get it. So this is how we ended up with this awesome sign on our wall. As you can see, it lists all the places Josh and/or I have lived (some of them together, some of them on our own).

Our Subway Sign

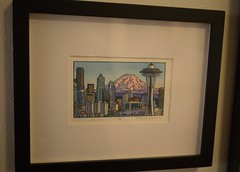
Also, we got a very cool Seattle print from our friends Jeff and Melissa. We framed that and hung it up as well. It's from another Etsy seller called Anagram Press. Isn't our wall cool?

Hanging Photos Photo Central

We intended to hang even more photos - to make one of those wall collages (or like this). It was taking forever to just get three things up though. So, like I said at the start, this is an on-going project. Some of the other photos that will eventually make it onto the wall are sitting on the table (you can see them in the above photo). For now, it looks great to me!

Wallflower

This weekend Josh had a lot of work to do, so I had to find a way to occupy myself. And I had the perfect craft in mind. I noticed a friend had this awesome flower thing on her wall. It was love at first site. I really thought she bought it, so I asked where she got it. It turns out it was handmade! It was made out of book pages. She took it off the wall and showed me how it was done. I was impressed (and jealous). I found myself thinking, "I want, I want."

(To get you to read on, here's my final product)

6793993555_3c85acedfc_b.jpg

So I did some rummaging online and came across a few sites that did wreaths with book pages - eh, close enough. With seeing the actual product up close and some DIY sites, I managed to figure out how this would come together. This is how I did it...

  1. I went to Goodwill and found an old, cheap book with some solid pages (e.g. a hard bound book with thicker pages rather than a flimsy romance novel (not that flimsy, romance novels are bad)). My book was about Pompeii...odd, but the pages were too good to pass up.
  2. I went to Bartells (drug store) and bought a small glue gun and some glue sticks.
  3. I had a hefty poster board that I had left over from my wedding projects. Then I took a big bowl, made a circle, and cut it out.

Those are the supplies, and then came the putting it together.

  • Rip out all the pages in the book (this hurt a little being an avid book reader).
  • Roll about 1/2 the book (it was a big book) into curl-cones. To make the cones, I took the bottom, right corner and rolled toward the top. It should look like a sugar cone almost. And staple the bottom.
  • Grab the glue gun, and starting from the outside, glue the cones along the edge. After you've made a full circle, start again one layer down.

wallflower.png
  • Keep layering until you get to the tiny center. Here I had to ripe more pages length wise and make smaller curl-cones. Then glue those in until you get so no more fit.
  • I used the top of a soda can to make a little thing to hang with. I just glued it to the back, and then hung it on our bedroom wall.

And that's it. A beautiful wall flower.

Here's the artist with her piece + Josh admiring my craftiness:

hj-admire.png

[Note: This is not a DIY blog now. I just had a crafty spirit take over me. I am not a crafter, although I sort of aspire to be one; they're so crafty.]

Crafty Christmas

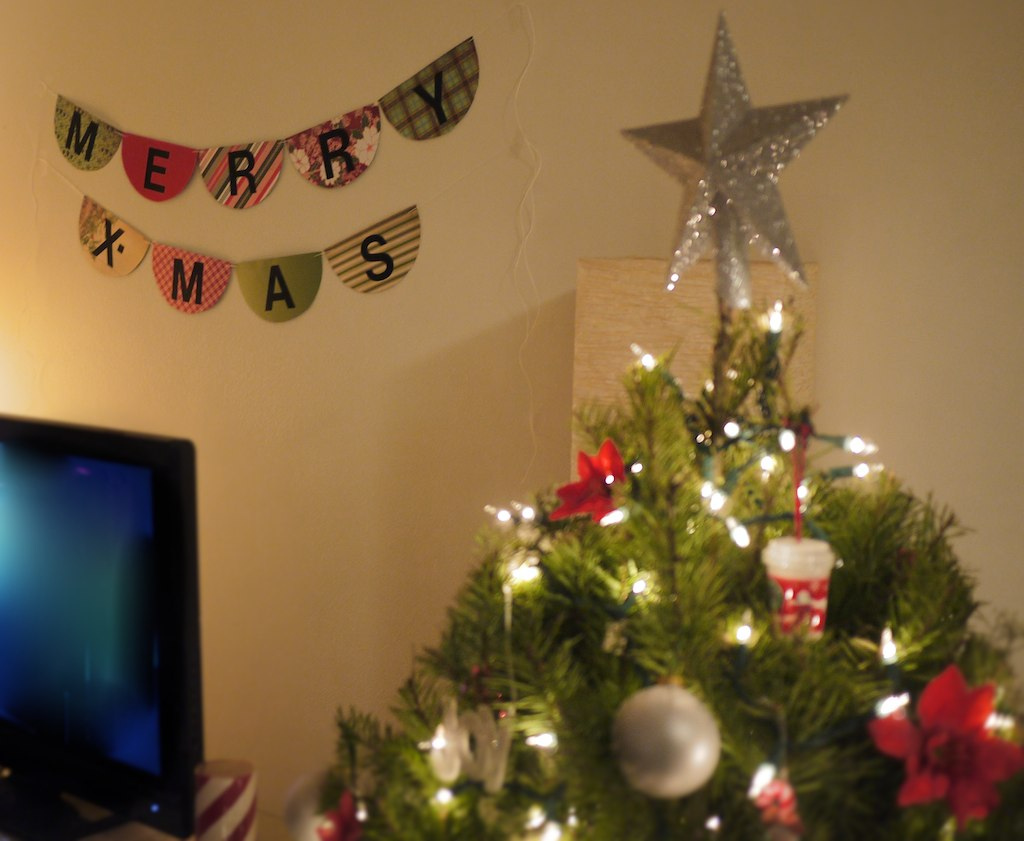
I was a bit crafty this Christmas. I made my own little Christmas sign. The idea was sparked by my wedding when I made a Hitched sign. I thought, "hey, I did it for the wedding, I can do it for Christmas." And so I did.

How did I do it? Simple. Follow these steps:

  1. Buy awesome paper. For instance, Paper Source or a craft store. Personally, I went to Impress Rubber Stamps. I also bought a cool snowflake stamp on the same visit for our Xmas cards.
  2. Buy some sticky letters. That's not the correct name, but I'm sure if you tell someone at the store, they'll know what you mean. I went to Michaels. While at the store, remember to get some string if you don't have any at home. Some twine would be neat too!
  3. Find a medium sized bowl in your kitchen and a scrap piece of cardboard.
  4. Make a stencil by making a half dome on the cardboard. Do this by using a pen and tracing the edge of the bowl. Cut it out.
  5. Use this stencil on your cool paper.
  6. Spell out whatever you want to say. I went with "Merry X-Mas."
  7. Use an exacto knife to make little slits on the edge of the letters - two of them, one on the left and one on the right.
  8. Thread the twine or string through it.
  9. Hang it in your home and smile.

Here's my result (I tried to get artsy fartsy with the photo):

6514266021_5fa0f0680a_b.jpg